This is the fifth and final blog post of the Firebase series, which consists of Cloud Messaging Service i.e. sending FCM notifications for user-retentions followed by Remote Config, a service that lets you change the behavior and appearance of the app with the help of a few configurations, vis-à-vis App Deployment i.e. Flutter Web App (static or dynamic content) via Firebase Hosting. So, without further ado, let’s get started with Cloud Messaging, Remote Config, and App Deployment in Flutter Firebase.
Note: If you have not gone through my previous Firebase blog posts, check out here.
- Achieving Cloud Firestore and Ml-Kit in Flutter Firebase
- Firebase Real-time and Storage for Flutter Apps – A Practical Guide
- Mastering Firebase Services – Authentication and Crashlytics in a Flutter App
- Adding Firebase to Flutter App – A Latest Integration Overview
Table of Contents
Note: We are going to continue with our existing project, i.e. Student Grading, ensuring the entire Firebase equipment gets synchronized.
– Cloud Messaging
Firebase Cloud Messaging (FCM), a cloud-based service, allows developers to send notifications, messages as well as payloads to Android, iOS, and Web apps.
Here are some of its key features:
Support for Cross-Platforms:
FCM can be used to send messages to Android, iOS, and web apps, making it a versatile solution for developers.
Notification Messages:
With just a trigger, FCM sends a notification message to the recipient’s device. These can include text, images, and metadata as well.
Topic-Based Messaging:
FCM supports topic-based messaging, allowing you to send messages to users who have subscribed to a specific topic. This simplifies the process of users having a shared interest.
Real-time Delivery:
FCM messages are received in real-time, ensuring users get timely notifications.
Security:
FCM ensures the safe and efficient delivery of messages to users with the help of its reliable cloud infrastructure.
Lastly, FCM has both server-side components for sending messages and client-side for receiving and handling messages within the app.
Implementation:
Initially, add these plugins under the pubspec.yaml file:
flutter pub add flutter_local_notificaitions firebase_messagingWhereas:
flutter_local_notificatiions is responsible for displaying an instant notification when fired from the dashboard.
firebase_messaging is responsible for the reliable delivery of messages to various platforms.
Now, we need some additional configurations for Android and iOS.
Android:
Under AndroidManifest.xml, before the closure of </application> tag, add the following:
<meta-data
  android:name="com.google.firebase.messaging.default_notification_channel_id"
  android:value="student_grading_id" />
This creates a default channel_id for our project.
Furthermore, before the closure of </activity> tag, add this snippet:
<intent-filter>
  <action android:name="FLUTTER_NOTIFICATION_CLICK" />
  <category android:name="android.intent.category.DEFAULT" />
</intent-filter>
This handles the callback event on the notification itself.
iOS:
Under the ios/Runner.xcworkspace, be sure to activate these services:
- Enable push notifications

- Backgroud Fetch
- Remote notification
Secondly, add a new file as firebase_configurations.dart, and place the following snippet:
import '../../exports.dart';

/* Callback event on tapping notification */
void notificationTapBackground(NotificationResponse notificationResponse) {
  print("notificationTapBackground");
  SgNavigation().push(const StudentGradingListView());
}

FlutterLocalNotificationsPlugin? localNotificationsPlugin;

class FirebaseMessagingManager {

  Future<void> init() async {
    await Firebase.initializeApp(options: DefaultFirebaseOptions.currentPlatform);

    /* Request permissions on app start */
    await FirebaseMessaging.instance.requestPermission(
      announcement: true,
      alert: true,
      carPlay: true,
      criticalAlert: true,
    );

    await FirebaseMessaging.instance.setForegroundNotificationPresentationOptions(
      sound: true,
      alert: true,
      badge: true,
    );

    localNotificationsPlugin = FlutterLocalNotificationsPlugin();

    /* Create notification channels for iOS and Android */
    const AndroidNotificationChannel androidChannel = AndroidNotificationChannel(
      'student_grading',
      'student_detail',
      importance: Importance.high,
    );

    var initializationSettingsAndroid = const
    AndroidInitializationSettings('mipmap/ic_launcher');
    var initializationSettingsIOS = const DarwinInitializationSettings();

    /* Setup initialization settings */
    var initializationSettings = InitializationSettings(
        android: initializationSettingsAndroid,
        iOS: initializationSettingsIOS);

    localNotificationsPlugin!.initialize(initializationSettings,
    onDidReceiveNotificationResponse: (str) {
        Map<String, dynamic> data = json.decode(str.payload!);
        handleClick(data);
     },
    onDidReceiveBackgroundNotificationResponse: notificationTapBackground,
   );

    /* Event gets fired when it receives background payload */
    FirebaseMessaging.onBackgroundMessage(notificationHandler);

    FirebaseMessaging.onMessage.listen((message) {
      _notificationsHandler(message);
    });
    FirebaseMessaging.onMessageOpenedApp.listen((RemoteMessage? message) async {

      Future.delayed(const Duration(milliseconds: 300), () {
        if (message != null) {
          debugPrint('background app');
          handleClick(message.data);
        }
      });
    });

    FirebaseMessaging.instance.getInitialMessage()
    .then((RemoteMessage? message) async {

      Future.delayed(const Duration(milliseconds: 300), () {
        if (message != null) {
          debugPrint("background notification ${message.data.toString()}");
          handleClick(message.data);
        }
      });
    });

    /* Getting the generated token from Firebase */
    getToken();
  }

  Future<String?> getToken() async {
    try {
      String? token = await FirebaseMessaging.instance.getToken();
      debugPrint("Firebase token $token");
      return token;
    } catch (e) {
      debugPrint(e.toString());
      return null;
    }
  }

  void handleClick(Map<String, dynamic> data) {
    SgNavigation().push(const StudentGradingListView());
  }

  /* Display notification once a payload received */
  Future<void> _notificationsHandler(RemoteMessage message) async {
    RemoteNotification notification = message.notification ?? const RemoteNotification();

    if (notification.title != null && notification.body != null) {
      _displayNotification(message);
    }
  }

  Future<void> _displayNotification(RemoteMessage message) async {
    RemoteNotification data = message.notification ?? const RemoteNotification();

    /* Configuring specifics for Android and iOS */
    var androidPlatformChannelSpecifics = AndroidNotificationDetails(
        'Student Grading', 'student',
        importance: Importance.max,
        playSound: true,
        channelDescription: 'description',
        icon: 'mipmap/ic_launcher',
        styleInformation: BigTextStyleInformation(data.body ?? ''),
        priority: Priority.high);

    var iOSPlatformChannelSpecifics = const DarwinNotificationDetails();

    var platformChannelSpecifics = NotificationDetails(
        android: androidPlatformChannelSpecifics,
        iOS: iOSPlatformChannelSpecifics);

    /* Encode the payload on the basis of platform */
    await localNotificationsPlugin?.show(
        1, data.title, data.body, platformChannelSpecifics,
        payload: Platform.isAndroid
            ? json.encode(message.data)
            : json.encode(message.notification));
  }

  Future<void> notificationHandler(RemoteMessage message) async {
    _notificationsHandler(message);
  }
}
Now, link this file under the main() method, after initialization of Firebase itself.
Code Snippet:
Future<void> main() async {
  WidgetsFlutterBinding.ensureInitialized();
  await Firebase.initializeApp(
    options: DefaultFirebaseOptions.currentPlatform,
  );

  await FirebaseMessagingManager().init();
  FlutterError.onError = (errorDetails) {
    FirebaseCrashlytics.instance.recordFlutterFatalError(errorDetails);
  };

  PlatformDispatcher.instance.onError = (error, stack) {
    FirebaseCrashlytics.instance.recordError(error, stack, fatal: true);
    return true;
  };
  runApp(const App());
}
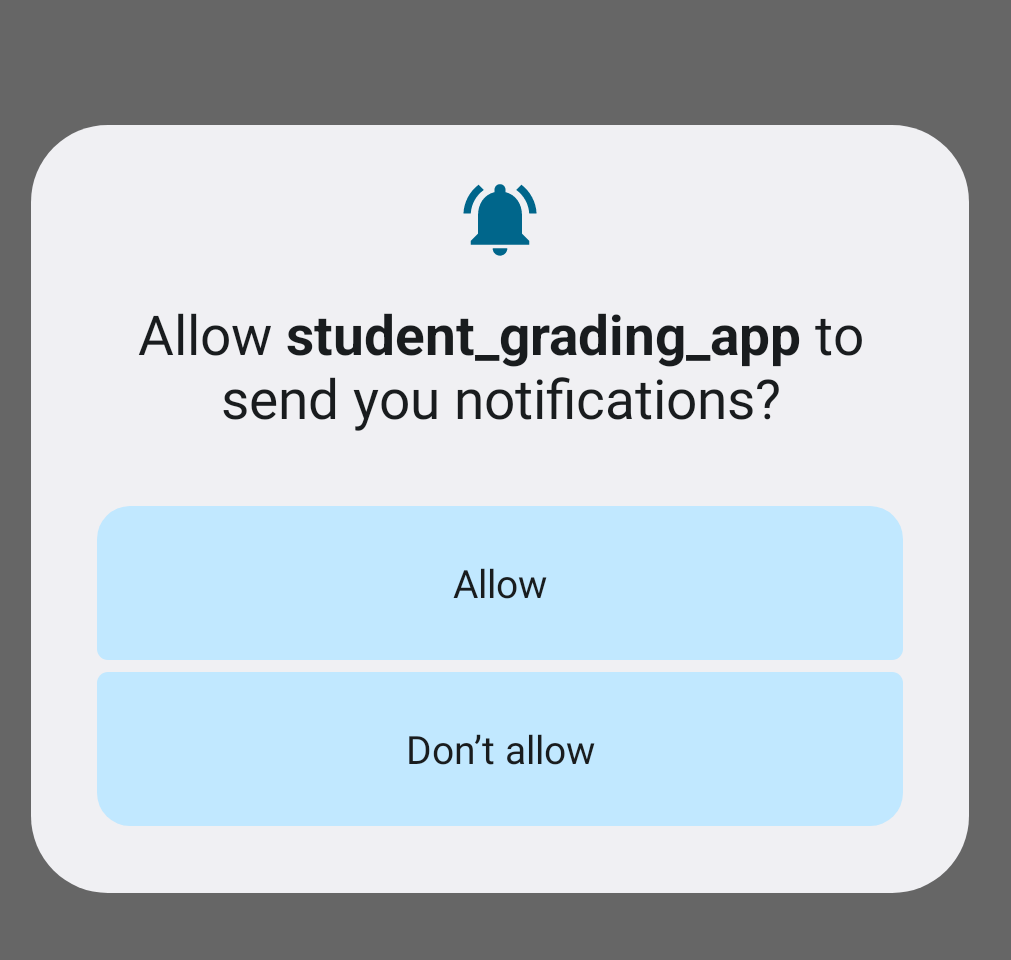
Run the app and you will be asked for the relevant permission.

Upon allowing, you will see the token gets printed on the console as well.
Let’s now test a notification from the Firebase dashboard.
Note: Be sure to copy the token.
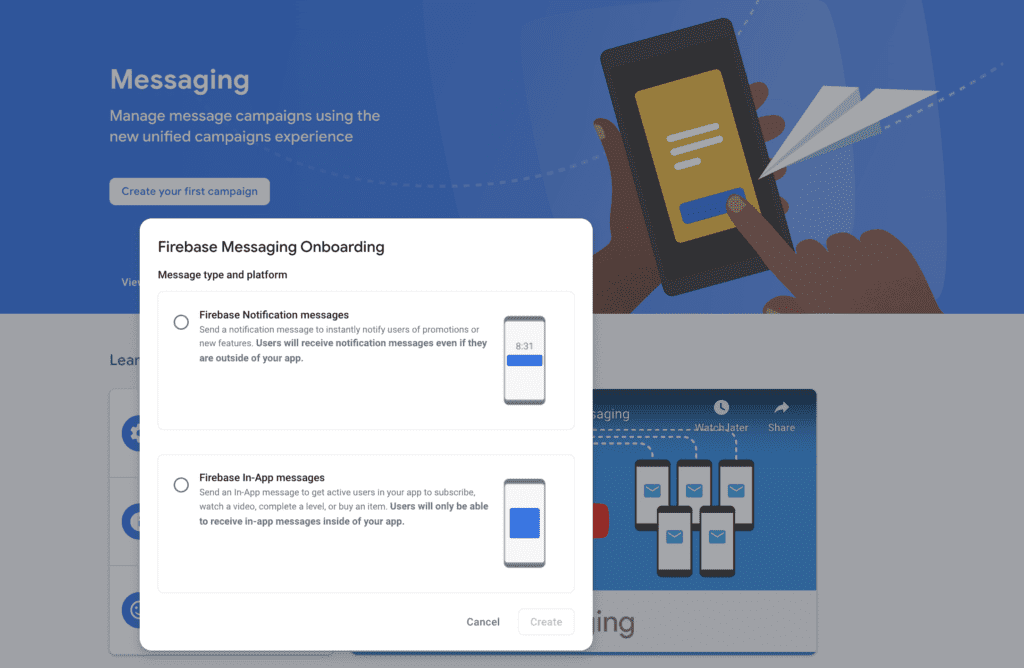
Under the Engage section – Messaging tab.

Select the first one, and create your first campaign.
Video Preview
This section is completed here. Let’s now look at Remote Config.
– Remote Config
Firebase Remote Config is a cloud-based service designed to change the interface/appearance of an application without having to migrate to a newer version, i.e. the change gets reflected instantly.
Key features and benefits of Firebase Remote Config include:
Dynamic Configurations:
You can change the parameters and settings of your website or app remotely. This includes texts, image URLs, numeric values, and so on. Additionally, this also helps in responding to user requirements much quicker.
Versioning and Rollback:
You can create and manage different versions, which makes it easy to roll back to a previous one if a new one causes issues or needs performance comparison.
Caching:
Remote Config includes a caching mechanism that ensures that changes are readily available to users without causing excessive network requests.
Implementation:
In the Firebase Dashboard – Engage section – Remote Config:

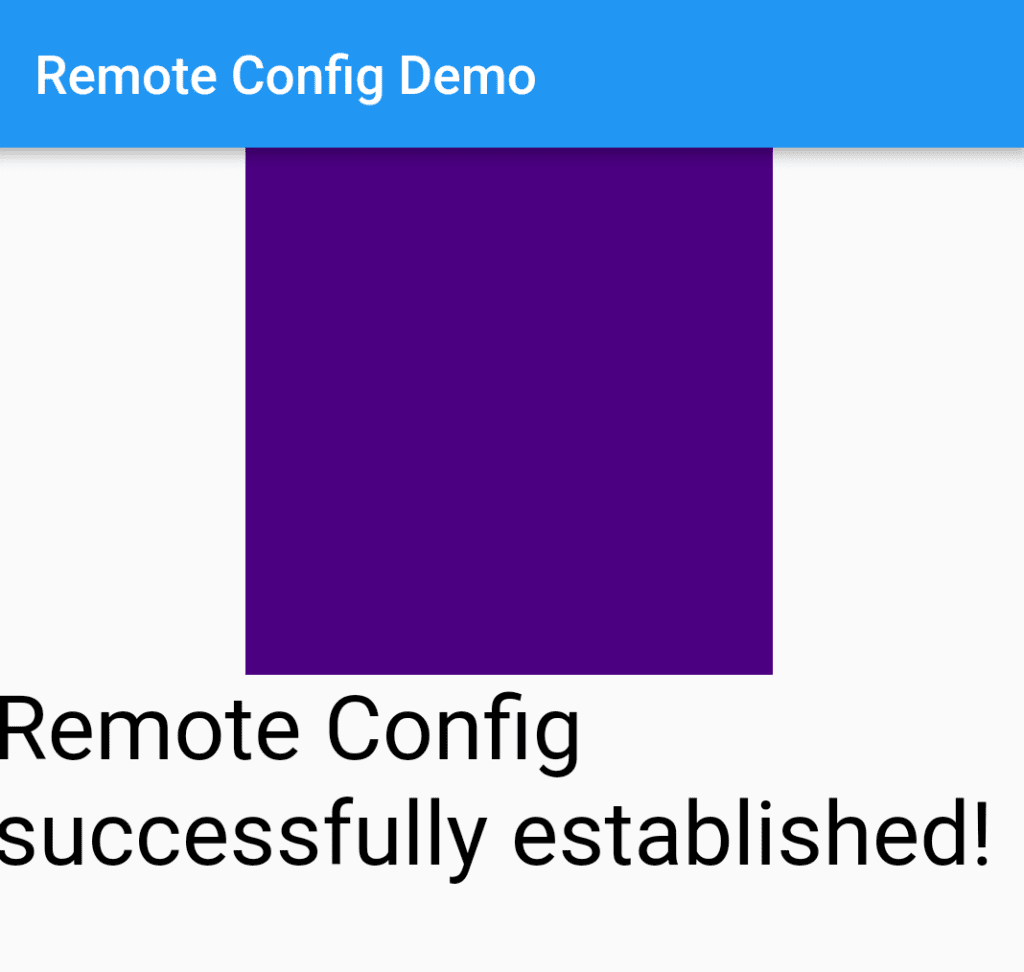
Let’s now create our first JSON:
[
  {
    "type": "Container",
    "color": "0xff4B0082",
    "height": 200,
    "width": 200
  },
  {
    "type": "Text",
    "value": "Remote Config successfully established!",
    "fontSize": 34,
    "color": "0xff000000"
  }
]
This JSON represents an Object having a Container and Text with some attributes as well. We shall parse these values in our existing Flutter App.
For that, head over to pubspec.yaml file and add this plugin:
flutter pub add firebase_remote_configNext, in the project itself, add a new file, namely firebase_remote_config.dart, and paste the following snippet:
import 'package:firebase_remote_config/firebase_remote_config.dart';

class FirebaseRemoteConfiguration {

  /* Create an instance */
  final rc = FirebaseRemoteConfig.instance;

  Future<String> init() async {
    await rc.setConfigSettings(RemoteConfigSettings(
      fetchTimeout: Duration(hours: 12),
      minimumFetchInterval: Duration(hours: 12),
    ));
    await rc.fetchAndActivate();

    String response = rc.getString('remote_json');
    return response;
  }
}
Note: fetchTimeout is the maximum duration to wait for a response from the server and minimunFetchInterval is the maximum age of a cached config before becoming obsolete.
Furthermore, add a new file as remote_config_view.dart.
In this file, we need to add the following:
- Create a list of widgets – we will get the type from JSON and store it in the list.
- Convert Object values to their relevant Widgets
Code Snippet:
  late List<Widget> list;

  @override
  void initState() {
    // TODO: implement initState

    list = [];
    retrieveResponse();
    super.initState();
  }

retrieveResponse() async {
    var serverJson = await FirebaseRemoteConfiguration().init();

    for(var item in jsonDecode(serverJson)) {

      String type = item['type'];
      list.add(toWidget(item, type));
    }
    setState(() {});
    return list;
  }

 toWidget(element, type) {
    switch(type) {

      case 'Text':
        return Text(
          element['value'],
          style: TextStyle(
            fontSize: element['fontSize'].toDouble(),
            color: Color(int.parse(element['color'])),
          ),
        );

      case 'Container':
        return Container(
          height: element['height'].toDouble(),
          width: element['width'].toDouble(),
          color: Color(int.parse(element['color'])),
        );

      default:
        return SizedBox.shrink();
    }
  }
Once done, it’s time to display the entire list via:
body: Column(
  children: [
    ...list,
  ],
),
Note: Be sure to restart the app after changing any value(s) from the server.
Preview:

Remote Config ends here.
– Flutter App Deployment
This one is another interesting hot topic that comes under Firebase Hosting.
Firebase Dashboard – Build – Hosting

Throughout all the blog posts, we have covered stuff related to the Flutter Mobile App, but this time, we shall dive into the Flutter Web App.
In the existing project, we re-run this command:
flutterfire configureTo configure for the Web as well.
Note: If you want to try it out – just run it like flutter web -d chrome.
Before deployment, we must have a web release.
In the terminal itself, we run this command:
flutter build web --releaseNote: If, for any reason, the command fails, you can try this one for an instant fix.
flutter create .After the successful build, head over to:
cd build/webIn the meantime, be sure to get started with Firebase Hosting under the Dashboard.
Run the following commands:
firebase init hosting

-- Select your project --

-- Hosting Setup --

? What do you want to use as your public directory? /
? Configure as a single-page app (rewrite all urls to /index.html)? Yes
? Set up automatic builds and deploys with GitHub? No
? File //index.html already exists. Overwrite? No

firebase deploy
Upon successful deployment, you shall see the hosted URL.
Additionally, in the Hosting Dashboard, you will be able to see the entire detail in the domain view as well.
With this, I would like to seek your permission to wind up this blog post as well.
I hope you enjoyed it till the end.
Concluding up
Cloud Messaging, Remote Config, and App Deployment in Flutter Firebase. I think this one was a bit lengthy compared to my previous posts, but I am confident that I tried my best to deliver the message to my audience.
Thanks much for your precious time!

